Search This Blog

Friday, September 23, 2011

Added Pictures...Better late than never!

I have the technology!  Finally I am able to take pictures again. So here are the few I have to add to the previous blog entry.


A wee pic of a very tatty bow... with some undercoat.  I mentioned about starting jobs and not finishing them in a previous blog, well here is a fine example.  I started stripping back the wood and then the rain came on,  ultimately the job was forgotten about and no doubt will have to be re-done at some point.


Here is the first picture of the wheelhouse with her undercoat on.  You can see the 'pelmet' is still untouched, but how long do I leave it for?  The hatch cover on the deck is over the space where the first set of planks have been removed.  I will add photo's later with the deck opened up.


Another view of the undercoated wheelhouse.


You can see the 'dining room' chair that is hanging together by a thread.  Its actually a very good work bench, but really is knackered!


Just aft of the orange pipe you can see a thin line cut in the deck.  This is for the removal of the planking aft for the the ultimate removal of the engine.


Another view of the bow.  The rope coming off the bow into the water is actually attached to a chain and anchor.  You can just see the chain poking above the water.  I put this out as the weather here has been b*&^**^ awful recently.  It has worked pretty well as its held her out from the wall since it was put on.

Well that's it for the moment.  Weather permitting I should be down over the next few days to carry on with the deck removal and if I can get some help I will hopefully start re nailing her soon as well.  Any volunteers??

Aye

Monday, September 19, 2011

No Pictures... and a dead camera!

Again I have been slow in getting a new blog out to keep you up to date with the progress of restoration, my excuse this time is that my camera decided to fall off the couch onto the laminate floor and stop working.  Not only that but the memory card will not allow me to transfer the latest pictures onto my computer....The joys of technology!

Well, where are we??

I have still been working away on the deck and wheelhouse (More about the hull in a bit).  I started by continuing to removed the paintwork from the deck up to the gunwale top, oiling and then undercoating.  This has been a very slow process and virtually every time I get down to her, the rain starts! 
I'm beginning to have a lack of sense of humour these days when it comes to the rain..  I seem to go down when its favourable, and yes I do check the forecast, then an hour later the heavens open and it starts to drizzle or rain.  I don't mind getting wet  too much myself, but the tools don't like it, especially the power tools I use for the paint stripping!  The generator would probably be ok, but I'm not happy with 240 volt cables getting soaked on deck. I'm sure it would make for an interesting view of me going up in a blue spark!

So what I have been doing when unable to strip paint or use power tools? 
I have started to remove the deck planking above the engine so as to arrange its removal.  I have already lifted the deck where it had been cut in days gone by for access and last week I cut a new line where I am going to take the deck further back.  I had hoped to get that part of the deck removed today, but its chucking it down again...I may get down later... 
When that part of the deck is removed then it should be straight forward to get the engine more or  less lifted straight out. 
Ok, so when was anything straight forward on a boat?

As to the wheelhouse.  As I have mentioned before, the wheelhouse has now been completely stripped back to the metal and primed with red oxide.  I finally managed to finish the roof area a couple of weeks ago and primed that also. 
Of course, I still have to have the 'pelmet' above the windows cut back, this is mainly due to the fact that the engineer (who has more or less promised me his 'first born' because he is taking so long) is still too busy to get down and finish the job off.
Now to be fair to the engineer, he is not charging me for his time (I do cover his costs though!)and he does have to come a long way to get to the Lady. However, this 'saga' has been going on for six months now and that's been the main reason for not painting the wheelhouse.  I figured that if I painted it and he came along with his 'still saw', the paintwork would be tarnished and have to either be re-done or would prove to be a problem in the future.
I am hoping that the undercoat will not be damaged too much by the grinding down of the pelmet.... watch this space I guess.. I'm not going to go into detail about the two holes in the roof that were supposed to be welded up as well....

Right the hull! 
About two weeks ago I decided to move the boat back up the beach about 20 feet.  she has been sitting in a 'trench' that she has created with the movement during heavier weather and the Lady really had to get out of it. 
I managed to get myself wound up to the point I was convinced that she was sitting at such an angle that her back might break.  After moving her, I realised that it was the way she had dug herself into the trench that was causing the illusion of a 'bent keel', there was absolutely nothing wrong with the way she was.... You could hear my sigh of relief from the other side of the bay I am sure! 
The Lady was surprising easy to lift again (After a wee bit trial and error).  I tried to lift her with just the 3 inch pump on the first day, which was a silly mistake.  She had been sitting for nearly four months without me touching the hull since the last time I had to pump her out after the storm when she went over onto her side.  Of course some of the caulking had been washed out and also two or three more planks had become loose since then.
So basically on the second day I went down and re-caulked the open seams and hammered in the nails on the loose planks.  This did the trick fine and she lifted with the 3 inch pump barely ticking over.  It was only after two hours afloat did I have to start throttling up and even then the pump was never overwhelmed.  
From that exercise I now know where all the major leaks are and where much of the re-nailing is required.
It was sad on the third day when I had to go and pull out a few of the seams again in order to stop her floating.     
Note that I have been allowing the sea water to drain in and out of her, mainly because it stops her from moving up and down with the tide as if she was fully floating every second wave would cause her to 'pound' off the sea bed.  She is much safer and less likely to be damaged sitting upright and on the sea bed at all states of the tides.

Of course this has to change...Due to finances amongst other things I have been slow in working on the hull and getting it watertight. That has to change imminently as I HAVE to move her away from the harbour, there is no way she will survive another storm in the corner where she is at present..

Thankfully, the nails have arrived as well as the tools for drilling out and countersinking them.  Now all I need is more sealant to be able to re-caulk and some help and advice as to how to do it with causing more problems than I have already!

Hopefully pictures and more information very soon!!


Monday, July 25, 2011

July, How do you estimate?

How do you estimate the time it takes to do a project?
It is now coming towards the end of July and I am about three months behind where I wanted to be with the Lady Evelyn restoration project.  Whilst I can blame the weather, tides and a myriad of other things, it really comes down to me and what I thought or think I can do within the time I estimate it takes.
For example, the boat wheelhouse was almost ready to be painted in April.  All that had to be done was the last roof panel, yet here I am in July saying the same thing. 
The roof is about 90% completed, but its not finished..  That last panel was left because the boat went over onto her side again, then the engineer doing the welding has not come back to finish off the last wee bit and then my own generator decided to die.  Not to mention that the pelmet has yet to cut back as well.
Most of you reading are probably thinking that I procrastinate about painting or getting on with other jobs but here is my reason for not painting.  If I apply the undercoat (wheelhouse is already primed) and then two topcoats of gloss and the engineer comes back to grind/weld etc then all the paintwork that has been done around those ares will be tarnished and burned.  I also believe that no matter how hard you try, cutting in paintwork at a later date makes for a weak point as well as often leaving a slight off colour between the new and older paint.


You can see here a definite paint discolour despite the fact this was from the same tin, but two days apart.

On the subject of painting, most of the work carried out over the past few weeks has been the removal of old paint and then the priming of the cleaned up area.  The job was made considerably easier by the purchase of a small grinder along with sanding discs.  This makes life so much easier when trying to take away rust that has bitten deep into the metal work.  taking it off by hand was a very slow and painful process.
Sadly my wee generator died about three days after getting the grinding tool.  I found it very difficult to start and then on closer examination I found a major leak of oil from around the head.  Between that and over tightening the carburettor bolt and destroying its 'seat' inside the bowl.  It was given the 'heave ho' and a new one purchased.
A note on the new generator, I have to say a huge thank you to my fiance for getting it for me.  It's demise came at the wrong time for me financially and she stepped in and got me up and running again through the powers of Mr eBay.  Thank you princess!!

This is me working away with the grinder and our original generator before its demise.

One of the things you can't really see was the fact that between Bob and myself we managed to remove the old beds for the winches.  This has cleared up the deck no end and its amazing how much space this seems to have left.  The beds were held in place my steel threaded rods, although not high tensile, they were bolted up hard under the deck and through the cross beams.  We took a sledge hammer to the tops and knocked them through, using another slightly smaller rod to push it through.  There was a satisfying 'clunk' every time one was knocked through and it hit the engine underneath.
The only bits of wood left to come off the deck are on the stern where the base of the davit's that held the trawl doors is located.  To think of that, I might make that the next job.
The removed wood is surprisingly heavy and still in pretty good condition.  I have hung onto them as they might be useful somewhere along the line.

You can see where the winch bearers sat here from the discolouration of the deck.

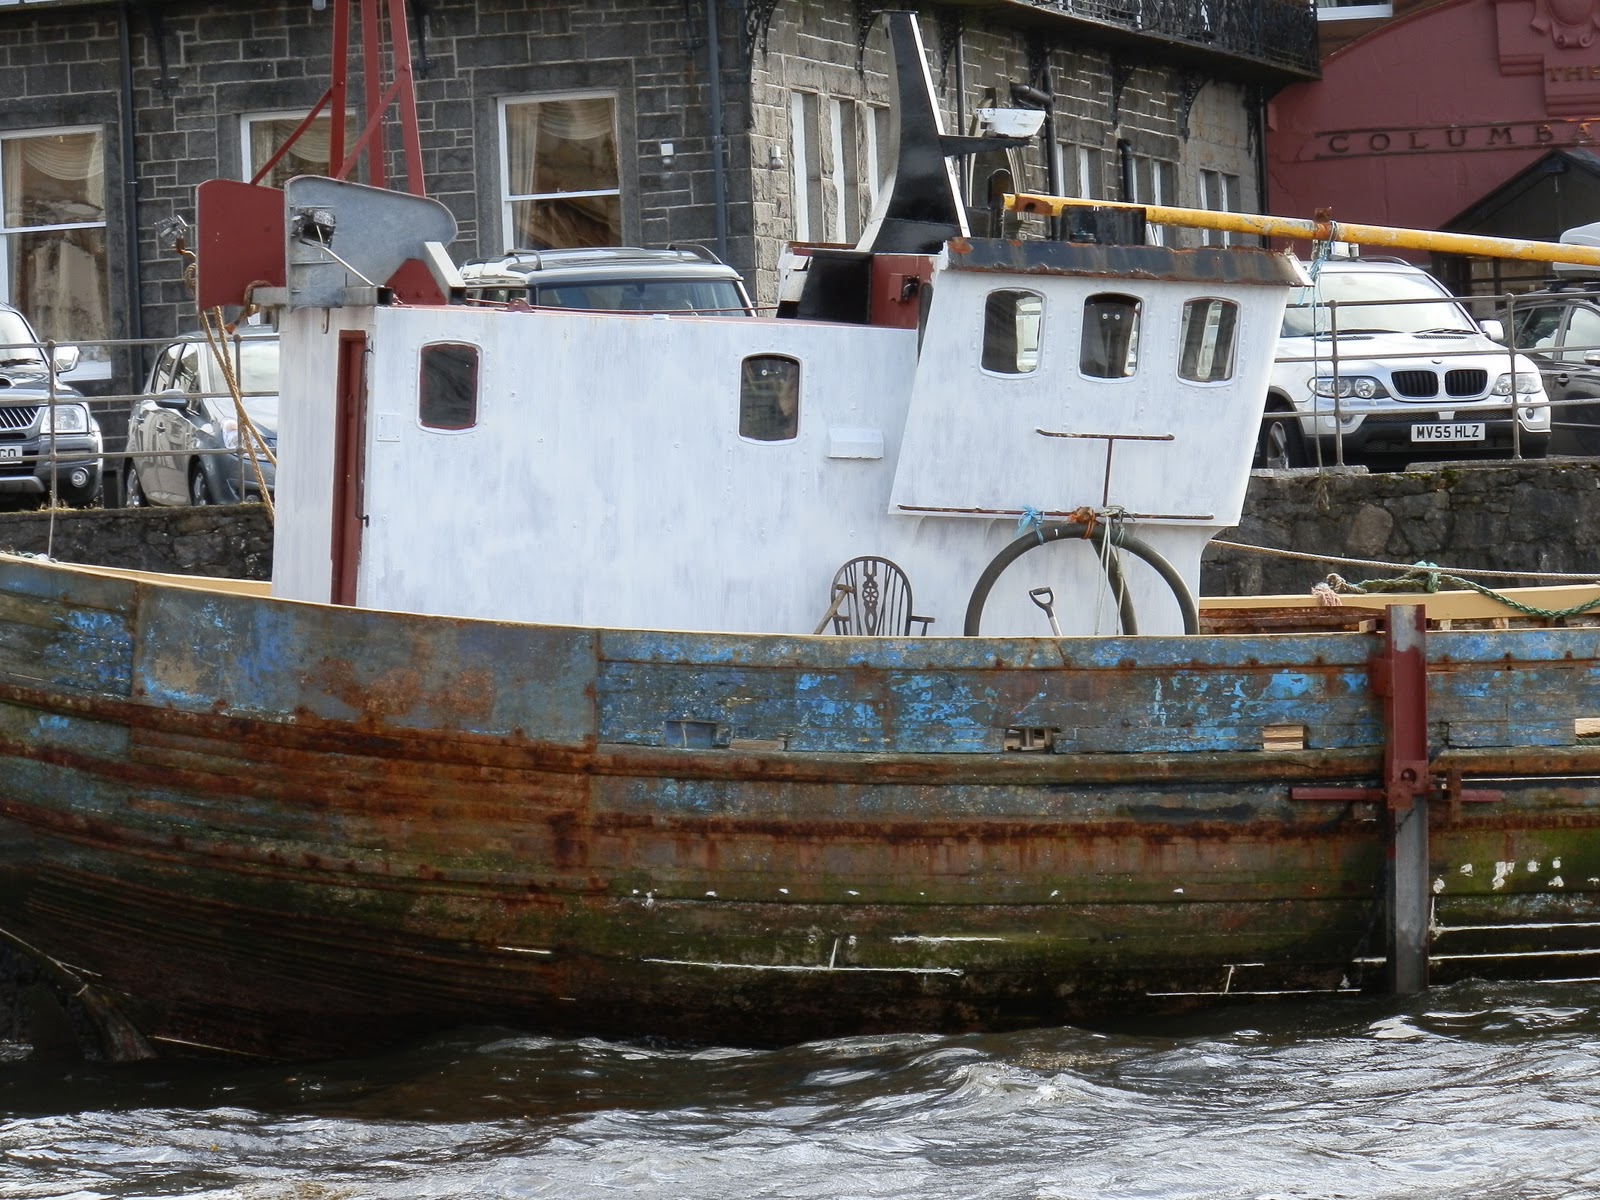
I have included a picture of the wheelhouse and its various stages of paint work below.  The only parts left to be done is the removal of the last part of the radar, the stripping back of the last of the roof above the wheelhouse itself and the pelmet.   I should say a huge thank you to my youngest son Aonghas here who spent literally hours chipping away the roof without a single word of complaint. 


You can see the pelmet and the state its in.  This will be cut back about two inches from the top and two inches from the bottom, clearing up all the rusted through areas.


This part of the roof took almost three days work. Adding in the sides you are looking at almost 14 days work all by hand. 


The day I finally completed the front, back and sides was a huge relief.  Now only the roof to finish off!

To the right of the last picture at the bottom, you can see the runner for the wires bolted to the side of the gunwale.  These have all now been removed as well.  All the metalwork that was redundant on the deck was cut away by Bob from Ardrishaig, who has an engineering company based there.  Bob also welded up much of the rest of the metal work that was needing done including the mast, the new step going into the wheelhouse and finally patching up funnel casing on the wheelhouse roof (Yet to be finished).  It was Bob who also dealt with re-welding up the leg after that storm!


That 'infamous' leg! Now bolted and properly welded in place.

So that almost brings everything up to date.  The job I recently started was the stripping down of the woodwork above the deck and into the corner of the gunwales.  It can be half done with the grinder but you have to be very careful and not let the grinder (With sanding disc attachment) run away with itself as it eats into the wood very quickly.  Once it has been stripped and cleaned I soak it with a 50-50 mix of Linseed oil and White spirit. After that I will coat it with wood primer and then undercoat/tops coats etc.
The job is quite a slow one as the areas being done are not the easiest in the world to get at.  
So watch this space for pictures of that process.

With regards to the hull and getting her afloat and onto a mooring.  I have priced the five inch nails and they came in at a very reasonable £260 for 200, delivered to the house.  So my next capital purchase will be for them.  Then finally we can start to re-nail her and get the hull finished.  
I have had several long conversations with people about the nailing process and I am not as distressed about the whole process as I was six months ago.  I have been given good sound advice from various people (you know who you are!) and they are happy to come and show me how to do it as well, which is great.


I am so looking forward to ripping out the old caulking and re-nailing, only to re-caulk it again... (Not!)


One final thing to mention.  The vessel is going back to her original name of the 'Bountiful' .  Once I have finished the wheelhouse painting and cleaned up the bow, her name will be put back the way it originally was.  She may also get her fishing numbers put back on, albeit with a wee red line through them, but that's under discussion at the moment. Ill also make sure her 'shamrock' luck line is restored to its full glory as well.

Sorry should have mentioned!  You can now view this blog on your mobile phone, it actually looks quite good as well.

Until my next entry!

Aye.

Tuesday, May 31, 2011

A waste of time....


This was the picture that greeted me when I went down last Monday during the storm that hit us.  The steel leg had sheared off and she was awash, sadly she is lying over on her starboard side again and all the caulking that I had spent many hours putting in had blown out from the deck and the Port side as well. 

One step forward and three steps back....

Well these things happen... What can you do??  I took some pictures and went home.  There was no point in worrying or standing for hours with a tear in my eye whilst she was battered around.  This was the teeth of a force ten and blowing from the south west, the one direction that spells disaster for any vessel laying where the lady is at present.
sadly when I went down later that day she had settled on her side again this time she has an 'H' beam sitting under her and (at the time) I had no idea if any damage had been done.


I couldn't see for the best part of a week as to whether any damage had been done to the hull by this.  But going on today's quick inspection... It appears that the leg has buried itself in the shingle and is not bent through the hull.  Its going to be fun digging the thing out now as it all has to go back on again over the next few days.

Previously to this, I had managed to get two thirds of the wheelhouse stripped and painted with red oxide.  It was looking very good and the last side of the Lady was about to sanded for painting, then of course the storm happened.


The port side, the aft of the wheelhouse and the top half of the front is done and ready for undercoat.  However I was waiting to complete the whole lot before starting that.  Now that will have to wait until she is back upright and level.

Here are a few more pictures of the damage and the boat during the storm.

High Tensile Steel Bar Sheared Through

Leg Ripped Off

Tensile Bar Damage Caused

Decks Awash

Wood Ripped By The Tensile Bar


The only other damage to the vessel seemed to be in two places.  The first was the fact that the protecting steel that is nailed to the hull to save the wood from nets etc was torn out and left hanging.  This was difficult to understand as to how this happened as it was nailed tight to the hull.  I think its because the movement in the hull put strain on the nails and they just popped.

The second area is on the stern and its post, there is at least five or so planks that are no longer tight to the stern post.  i guess the movement caused them to part.  More fastening and re-nailing methinks.

To look on the positive side of things, it could have been a hell of a lot worse.  She is in a killer berth and the people who originally put her there knew this.  Since taking her over and trying to move her, many comments have been made as to 'what the h"%l was I thinking' putting her in there in the first place! Since I had nothing to do with that I can only comment on my existing issues, like how quickly I can get her somewhere safe.

I'm tempted to have a rant here about the certain individuals who have read this blog and made telephone calls to the 'Powers' about the possible movements of the vessel and its legality.  Well, since you couldn't/cant be bothered to come and have an informal chat to me about it, you can whistle.  I mean going behind backs and complaining like a 'tattle tale', come on! I forgot that we live in such a small minded place sometimes..... oh well

Finally as to my heading!  Yes to you 'Anonymous' this project might be a waste of time, but its not your time its wasting.  If you read the blog in its entirety you will have perhaps learned something and therefor not wasted your own time! 
Productive and useful comments are welcomed, ones like 'What a waste of time'.... well your entitled to your opinion but why waste it here?

Tuesday, April 26, 2011

An update, long overdue!

Time seems to pass by very quickly these days!

We have had a bit of a disaster with the Lady after fitting her new leg.  It goes something like this.....

We managed to fit a brand new 12 x 6 leg to her which was slightly to long.  I hadn't measured her properly and was 'estimating' what I thought was the correct length.  This is a very deceiving business when your on your own.  I thought the leg looked rather short when I measured up, so I added about four feet to my original length.  This was a big mistake.  When she sat upright and settled with the tide, she had heeled over to port quite considerably and this caused her to lean into the sea wall.


As you can see she is heeling over to Port and is tight against the wall.  This was not what I had hoped but I had got the measurement very wrong.  You can also see that the leg is made up of six 12 x 2 planks bolted together.  Whilst this held absolutely fine it is not recommended that any else attempts this, the original order was for solid sleepers but these became unavailable at the last minute and I felt under pressure to get things moving.  The planks were bolted three together and then two sections lashed.  On the whole it was great to get the boat up, but not so great that the whole measurement business had gone to hell.

Obviously you can see this was far from satisfactory so I managed to get hold of the long awaited telegraph poles.  This was in fact one of my better ideas and I had taken advice on the strength of the poles as well.  However...


Here is Richard holding the line from the keel out, this was a pretty accurate way of measuring as you can see in later pictures.  The original leg was marked and the new telegraph pole leg was drilled to the first steel bar from that measurement.  Sadly I didn't get a picture of her sitting level after the leg was fitted.  However.......


If its going to happen to someone its going to happen to me!  You can see the telegraph pole is sitting straight up and down and is also secured at the top in order to give added strength for fore and aft movement.....  We didn't think we would have to worry about left to right movement....


What you cant see here is that the leg has actually under the boat.  There is a rock under the seaweed which is angled under the boat.  This has basically caused the pole to buckle as it slid down the rock, again I don't have a picture of digging it out (which took some effort!).  It was buried into the sea bed by about two feet.
What you can also see is the high tensile steel bars (HT Bars) that have cut through the telegraph pole like a hot knife through butter.  This could have been averted by 'banding' the wood by putting a ring of steel around the pole above and especially below where the HT bars went through.


You can see the damage more clearly to the pole here.  Its also possible to imagine the pole in the seabed and buried.


This happened on a Saturday night and I had arranged for an engineer to come and remove the corroded metal on Sunday.  Whilst his visit was a waist of time for getting onto the boat, in other ways things worked out.  Silver cloud and grey lining and all that.... We managed to have a think and decided that he would make up an H-Beam if we could get the material.  Now Sunday is not the best day in Oban to find something like an H-Beam (To be honest I actually didn't hold up much chance of finding one in Oban full stop!) however Bob (the engineer) actually knew a few wee backwater yards where things like that are stored.  After a tour we came across two 8 foot lengths and surprise surprise the actual owner of the H-beams as well! I explained what had happened and between tears and sobs (OK not quite!) he agreed to give me them.  I have to say a big thank you to John for allowing me to have them at no cost, it is much appreciated!!
So Bob spent the rest of the day welding up the beam and fitting a foot so we would not have a repeat of the 'digging in' issue that had killed off the telegraph pole.

The fitting of the beam was a nightmare for me.  I cant lift much as (you are probably aware of my pathetic back issues) you know, so Bob had to do much of the 'grunt' work, however a Farm foods trolley that had been salvaged from the sea came in very handy for rolling it the length of the pier!

It was then slid down the deck and over the side, with the use of a block and tackle it was hoisted into place so that it would cantilever into place when the boat lifted.

The boat lifting was a huge issue.  I had tried the day before to lift her on one pump.  But I had to switch it off for a few moments whilst the tide was rising and there was no way to recover from the ingress of water.  The following day when Bob was there I tried again and used both pumps.  This made no odds either.  It was then that I realised that I had much bigger problems than I had anticipated.  
When the Lady Evelyn had gone over, she had managed to move about three feet further out and had laid down on the same rock that had caused the telegraph pole to buckle.  This was putting a huge amount of pressure on the seams and in turn was causing a lot of water to come in. 
I honestly though t that this was the end of the project.  I knew that if I couldn't get the boat to lift the next day then that was the end for me, I could not and can not afford to have a professional salvage team involved to right her and I was thinking that this was perhaps the only way she was coming up.

Luckily I was on my own on the third attempt.  I came down early when the tide was just retreating from the hull and I watched where the water was coming out.  I then marked all the areas and worked like a Trojan to get all the seams re caulked that were leaking.  It was then that I also noticed that there was a seam just below the last rubbing strake at the top of the last plank which had no caulking what-so-ever.  This seam had been filled with putty that had gone solid, but had no oakum or cotton caulking material behind it, this left a twenty foot length of open seam at least 50mm wide letting in water then above this I also noticed that the deck had the same issue.  Where the deck was tight against the gunwale there was little or no caulking, let alone pitch, stopping water getting in. 
When the boat lifts the water will come to the top of the last plank and splash onto the deck, the previous day the water was coming well over the deck and causing her not to lift.
With all this done... she lifted as though nothing was wrong and on one pump!  Well I believe that and the fact I told her that if she didn't come up then that was me done and she was going for scrap!
You can see from the next photo that she is upright and absolutely level.


On the tide the beam levered into place and Bob came back and welded her up (Thanks Bob... More about him in a later blog). I took the added precaution of welding the leg directly to the Metal tops on the gunwale.  I reckon that if Bobs welds hold then the whole side of the vessel will come out before the leg bends or breaks!

She is now sitting perfectly level and the weight is directly on the keel, so much so that there is a gap between the harbour wall and the gunwale, the first time ever!

So that's her upright! and the saga that went with it.  We have yet to put on the Port side leg.  This is wooden, but will be reinforced unlike its counterpart on the Starboard side.  But that's another day! 

You can see that I have started to strip off the paintwork and rust.  The back of the wheelhouse took three days to complete with a hammer and coal chisel... but again that's another story!

More soon when I have finished the Port side of the wheelhouse (When I say finished I mean stripped and primed!).

Your Aye


Tuesday, April 05, 2011

Upright at last!

Finally we have managed to get the Lady upright and level!

Two days in a row she has been floating with minimal effort from the pump.  A joy to behold...

The wood for both temporary legs was delivered last week but instead of using it for both sides I decided to use the whole lot for the Starboard side, this gives dimensions for the leg at six by twelve inches.  I don't think that she needs too much in the way of support on the port side at present as the starboard side has historically been the heaviest and she is leaning on the harbour wall with her port side.  The two telegraph poles allegedly get delivered this weekend so they will be fitted properly shortly after.  The plus point, in the exercise so far, is that I am able to get very accurate measurements for the length on the legs (since I didn't know what the draft was) which should make for a simple and hopefully quick crossover.

I would like  to say a big 'thank you' to Richard who is one of the volunteers that I mentioned in a previous blog.  Richard came down on both the days to help out with the lashings and manhandling of wood and the Lady.  Between us we managed to get her ballasted and levelled out, the boat moved into deeper water and its his pump that he donated to the project.  His pump looks hellish cosmetically and has an old style starter chord however, it works a treat and was 'puttering' away in the back ground for most of the two days.  Unlike my all-singing and all-dancing piece of junk that seems to block if the wind changes!
Another 'Thank you' has to go to the guys at the council yard who were kind enough to let me borrow six wheelie bins in order to ballast her to starboard.   I was also given two 45 gallon plastic drums as well.  Without those drums and bins there was no-way I could have got her level.  Some of the suggestions for ballasting her have ranged from lowering ton bags of the cheapest aggregate from the builders merchants to buying two two ton mooring blocks and having them lowered to the deck.  The wheelie bins were the best option given that they were easy to move and filled up in seconds with the three inch pump. It was good to get an e-mail from Archie who had the same epiphany during the night regarding the wheelie bins and many thanks to him for the offers of help and advice as well. 
The wheelie bins are not so easy to empty though as they weighed a ton and had to be half emptied by bucket before they could be tipped. 
If my son, yes he's getting the blame despite the fact that he worked VERY hard yesterday, had put them round the other way they would have tipped straight back but he left them hard against the gunwale and to be honest I didn't even think about emptying them. 
It would have been too much hassle to use the pump and to be fair it only really took another ten minutes in the great scheme of things.

The Lady is now sitting, more or less, level and is easier to access.  The next job to do is to fit a wheelhouse door and then to scrape the decks in order to stop them behaving like an ice rink!

We also managed to get a good look under the starboard side of the Lady, which is really the first time I have had to have a proper look.  I cant see any 'sprung planks' or 'but ends' that are pulling out, its not that they are not there though.  There was plenty of seams leaking I noticed but other than that it seemed to be cosmetic.  I guess that once we are in and about her side properly then something will come to light.

I'm having tomorrow off though, my back went into meltdown whilst moving the pumps yesterday and it wasn't as though I was lifting much it was just an awkward movement that set it off.... The joys!!

Thank you to everyone else who came down and offered support and advice.  especially the chap who stood in awe and said "I honestly thought that I would never, ever see her afloat again.....amazing", that made my night.

Some up to date pictures below -

A view of the 'Wheelie Bin' Ballast on her Port side.

Resting on the Bottom, Ballasted and leg on Starboard side.

Afloat!

Afloat and happy the first night with no Ballast

Again afloat and happy on the first night.

Tide dropping after the leg being fitted.

The 'brand new' pump in between one of its 'hissy' fits 

The only visible leak on the Starboard side

Again a happy 'new' pump at full pelt.

The hardest worker of us all, also the one with the most advice!

One leg. Three feet too long awaiting adjustment. 


The only visible leak on the Starboard side again, is she not very clean for a year on her
(Starboard) side??


I will update again at the weekend once the new legs have arrived and been fitted,  unless anything exciting happens. 

Feel free to add any comments or send any questions that you might have!!

Sunday, March 27, 2011

Another day gone...

Its been an interesting semi-productive week in the world of the Lady.  I managed to get the tensile steel bar through the hull and then through the main stringers for the legs, not an easy task when tools fail and the tide will just not do as its told! (More later!). 
Also the local paper the Oban Times did a nice article on the boat and my intentions.  Of course my intentions changed almost as soon as the article was published, but I guess that's boats and the sea for you.

Its perhaps worth noting how grateful I am for the Oban Times to be taking an interest and printing my side of the story as far as the 'Blight on Oban Bay' is concerned. 
Obviously this blog pretty much tells the story of what is happening to the Lady Evelyn but I notice that not many people have seen/follow this site or have no real interest in whats going on other than the fact she looks like a derelict hull rotting alongside the North Pier.  There have been some wonderful discussions on our local radio station as well as letters to the Editor of the Oban Times talking about what a state the harbour is in because of her, but I beg to differ. 
I spend a hell of a lot of my time whilst working on the boat, explaining histories, taking advice or just listening to stories from the many people who take the time to stop and ask about the boat.  I can honestly say that the Lady Evelyn is photographed at least the minimum of twice for every time I am down hail, rain or shine! 
So I see the article was the first real defense of the boat against all those letters and discussions that have been had that I have not been able to respond to and I am very grateful for that platform.
I also have had  bit of interest from some volunteers who would like to come and work on her with me.  An engineer, a ships (marine) painter and a carpenter all of whom would like to come and do some work.  Again without the Oban Times I doubt if any of them would have come forward, so my whole hearted thanks for that.

So what's been happening?  I had acquired the 30 mm tensile steel bar some time ago.  Its galvanised and is as heavy duty as I could buy.  It will allegedly hold 100 tonnes plus but I don't intend either for myself or anyone else to be under the boat to prove that.  The idea is that it holds the legs on tight to the hull and then when I want to work proper under the boat I will shore her up with sleeper's or several braces.  That gives me the peace of mind that 70 or 80 tonnes of boat will not be worn as a 'hat' when I am caulking her starboard side. 
The bar has been put through the top of a rib above the deck level and has 6 inch square 1/4 inch mild steel plate to spread out the weight on the nuts for securing (See photo's below).  The second bar is through the main stringer below the deck, It is the strongest part of the vessel so I have no concerns that it will ever be a problem.  Again the steel plate is supporting the bar inside and out.
I had problems making the four 32mm holes.  I bought a brand new carpenters brace last December from a local hardware shop (I'm not going to write derogatory things about the shop and its staff, you can make your own minds up.... If you want the name e-mail me and I'll let you know).  I was also sold a 32 mm wooden drill bit which cost nearly £20.  These were bought after a long discussion about the location, size and depth of the holes and how difficult it was going to be for me to actually get in and physically drill them out.  the guy I spoke to promised that everything I had bought was ideal. 
However... As soon as I got everything together on the boat put the drill to the wood and took a turn with the brace, the head of the brace collapsed internally.  The teeth holding the drill bit buckled and could not grip the drill.
Of course I had no other option but to head back to the store and complain.  It turned out that I had bought the best brace they had to offer and they had no alternatives.   But as a work around they suggested that I buy or acquire an electric drill (Cordless). So I bit the bullet, got on my knees to my fiance and asked her if it was ok for me to spend another daft amount of money on what I called a 'professional drill, like real joiners use'.  Of course she just sighed and said 'whatever' which is code for 'dont you ever mention that bloody boat to me again and if you cant make the hole, find something that can.... have you paid the rent??'
So I purchased a 14 volt professional Bosch drill  thinking that this was the answer to all the problems of the holes.  On my first use of the drill, smoke poured out and the batteries lasted 5 minutes. But I managed 6 inches of the first hole!  It was then another trip back to the hardware store to ask them where I had gone wrong.  This time I spoke to another salesman who actually knew what he was talking about.  It turned out that the drill bought two days earlier was far to light for the job and should have been a minimum of 18 volts and that the drill bit I was using was far to heavy.  He directed me to a very light cutting tool for £10.25 but could do nothing about the drill because I managed to damage its box (Tensile steel bar and plastic boxes do not like each other, especially when the steel bar lands on it from 12 feet).  He did reckon that it should solve my problems, wouldn't take back the original drill though!
To be fair, the new drill and bit did go through the wood like a hot knife through butter.  It might have taken three days to get there but the holes were finally done on the boat.  Unfortunately the holes in the temporary legs were not....battery went flat!
Anyway, its now done.  The legs are not on but the holes are in and the bar is in place. 
The main reason for not actually doing the legs was more to do with a pump problem and access. 
I am also trying to source telegraph poles (or similar) for more permanent legs as the wood I purchased for the job to date is far too light for long term use.


Port Side

Starboard side

Starboard side


I took the new three inch salvage pump and started to pump her out,  the power in that pump is incredible but when it was running the plastic strainer smashed and I think I managed to get some rope or something into the pump housing as it dropped to about half pressure.  Tomorrows jobs is to dismantle and have a look, I ran the tensile bar through the uptake pipe and as it went through I'm assuming its not that.
Access is proving to be an issue as well.  Whilst it seemed like a good idea to keep her just off the harbour wall, its a nightmare trying to work around the tides to get any time on her.  Security is good though as nothing has been moved or removed since she was moved out that wee bit.... probably shouldn't have written that as Ive left a hammer on board until I can get down on Thursday, I dare say it will now be gone!
I think the access issue could be solved with a dinghy, so if you have or know of a dinghy that is available for purchase/donation to the project. Please get in touch.  Doesn't matter if its rough, 'we have the technology, we can rebuild him..' as they say! 

OK, the plan is to get back down to her on Friday 1st April and finally get her upright either then or on Saturday.  I realise that I am ten days to a week or so late but I have been trying!!  Ive arranged for the tow to be done then as well, so with luck and fair weather we could be in our new home a week today... or I could be writing about WHY we are not in our new home by then!

More pictures and an update whatever happens.

Sunday, February 27, 2011

A belated update -

Its, yet again, been a while since my last update.  Its easy to get sidetracked with family and other matters but those of you who have said that I have given up.... Sorry no!  Just because I don't spend every waking minute standing watching over her doesn't mean I am not down every day making sure that ropes and fenders are all in place and that there is no movement.
Also to those cynics that have said nothing is happening, well I can only get access to her at a 1.2 of a tide, this means that there is only a few occasion's that I can actually do anything constructive on her hull below the waterline.

However, the good news is that I have achieved a lot of caulking recently.  I managed to get down for a part of the big tides last week and have more or less managed to re-seal the port side.  She still has a lot to be done Port side wise but the worst of the rotten caulking was removed and replaced (How madly does rotten oakum smell??) all the seams re-caulked properly and then finally filled and painted. 

I have been criticised for not 'patching' her and moving her quickly, but I feel that there is no point in doing things twice, for one reason I cant afford it and for another the seams are way to long to effectively patch.  Its far easier and (I feel) quicker to just get on and do the job properly.

I have been using a method of caulking that I found in an old shipwrights book, where they use cotton coated with tar, instead of tar (Which I now have after taking a time to source) I have been using roofers bitumen.  It seems a wee bit light for the job, but I have put plenty into the seams as well as hammering home the cotton.  On top of this I have been using a linseed oil and red oxide putty mix (5% red oxide) to bring the seam up to level and then painting the whole thing with red oxide paint (See pictures).  This seems to work OK, and the finish is looking good.  I found an old table spoon on the beach and it is by far the best tool for forcing the putty in (Spoon end) and then by using the handle end running it along the seam to give a really nice finish.

Its very satisfying to see the finished result, but I fear that my linseed oil putty mix is wrong and perhaps should only be used above the waterline as it takes such a long time to set.
I have recently been in touch with a company called Traditional Boat Supplies whom are going to supply me with Oakum and another product called 'Black Pudding', the beauty of black pudding I think is that it goes very hard on the surface but stays ply able in the seam allowing for the natural movement in the timbers.  There was another boat in the other day doing a few wee jobs and they were using the pudding mix, apparently its mixed with concrete hence the 'black pudding' consistency when mixed properly.  Its allegedly made to some ancient Scottish recipe, probably like our very own Stornoway version!  I look forward to finding out if anyone else uses or has used something similar or their own make in the future.

The positive thing about Traditional Boat Supplies is that they are very approachable and will explain their products if you drop them a line, they also have a lot of products and experience of wooden vessels to match.  That and carriage to Argyll is not unrealistic.

As you can see from the photo's things are moving on, I still have a couple of acquisitions to make, namely the legs and also the 3' uptake pipe for the pump before I finally get her shifted.  It also appears that the boat I was planning to use is out the water for its winter refit but I dare say that I could get someone else to shift it.  I reckon by the next set of spring tides she will be moved to her new home on the other side of the bay.

Port Side

Stern

Bow

Sunday, January 23, 2011

OK... A Rant!!

As you can see from the pictures and comments of the last couple of posts I have seen first hand what happens to a perfectly good boat when she is being decommissioned. 

The English dictionary's description of the word 'decomissioned' is the act of dismantling.  But the word 'decomissioned' doesn't give away the reality of what that actually means in the fishing industry.

To me if you dismantle something you take it to bits, in fact the definition is to take it to pieces 'bit by bit'.  But the act of decommissioning a fishing vessel is to destroy the thing! 

We live in a 'green' society yet there is nothing 'green' about what happened to a fully working fishing vessel being destroyed.  However I do admit there is a percentage that is recycled... I have first hand experience of trying to salvage parts or as I put it previously 'Picking over a corpse'.

Lets discuss what happens to the vessel when it enters the decommissioning scheme..
First the skipper has to find somewhere for the vessel to be broken up.  These people/yard have to be prepared to take on the job of not only cutting her up but the removal of all hazardous materials as well as the safe disposal of other waste materials. 

The vessel is then steamed to the yard in question where all the fishing gear, that has not been left in her home port, is removed.  The removable items that don't belong to the boat (Electrics etc) have to be returned to where they were rented from and all the oils removed safely.

The deck machinery, shelter deck and masts etc are lanced off, removed and then the wheelhouse is lifted off for cutting up at some later stage.  The engine is removed as this has probably been sold on and that basically leaves the hull.  This (in my case) is towed to the top of a slip at high water and then taken to bits using a JCB!

The only things recyclable in this process is the heavy ballast, pipe work and tanks.  The wood from the deck of hull is of no value what-so-ever and the removal of copper nails or fastenings is minimal because the wood cannot be burned to get access to them.  This whole process from start to finish happens in a matter of days.

Take, for example, the Rebecca McLean picturedin the blog below.  She was built in 1977.  She probably took months to build and many thousand's of man hours to complete.  She was somebodies pride and joy when she floated off the slip, probably she was launched to a party at the home port with a proud skipper showing her off before the hard work began of working to justify her build in the first place.  
Again, because I did not know the boat, I will speculate that she employed at least four people on her for most of her career.  Along with the many artisans that kept her afloat from running maintenance to the many other things that would have needed to have been done.  From the lumpers who shifted her catch in port to the insurance company that kept her on the books and not forgetting everyone else that was involved in the bureaucracy of allowing her to catch fish. 

I think you get the idea I am trying to put forward that the decommissioning of this vessel did not just effect the owner, but an entire range of people who relied on her whilst at sea or alongside.  The list of people mentioned is by no means conclusive.

The sad thing is that once the boat is destroyed then that is her gone forever.  She cannot be rebuilt as there is nothing going to be left of her. 
Her design might be on paper somewhere and the odd picture might exist of her in here heyday. 
She was not like a car where ten thousand versions of her existed and many sit in collections, she was one off. 
Almost a piece if living art. 
There are damn few places left that can reproduce her, the people who could are either dying out or realistically cannot justify the cost of building a new version of her. 
Her only real chance was to have been kept fishing or sold/given to a passionate collector who could have converted her.

What options are there for a fully functional fishing vessel instead of being destroyed?

I have two in mind that could have saved her.  One personal and thought out of self gratification and the other through looking at the bigger picture in the world.

Yes, I would have loved to have her.  I would have converted her over time to be that classic live aboard I have always dreamed about.  I would have used her to tour whilst converting her as money and time would have allowed.  She was not like the Lady Evelyn that is needing so much work, she was a working vessel that deserved to be retired to someone like me to use and to encourage younger generations to love the sea and boats as much as I do.   She would have been used from the second she was handed over and would have travelled around from day one until the day I in turn passed her to one of my children. 
I would never have fished her again,  I would have made that solemn promise that even if it looked like she was to change hands outwith my family I would have kept to the condition, no commercial fishing. 
But I guess your 'word' cannot be your bond in our government's eyes.

The second option and a much more realistic one to my 'wishing for a pony' in the governments eyes... Why not give her to a third world country? 
How often do we hear of fishing fleets around the world being wiped out through Tsunami's or civil wars? or the myriad of other natural or man made disasters that happen on our planet on a yearly basis..
Could a charity not offer the skipper the cost of the fuel and a ticket home for him to deliver the vessel to literally anywhere in the world?  
Have we not been taught that to give a man the tools to do a job is better than giving him a loaf of bread?
The option of giving a man a boat and a net would feed him and his community for years to come and its not like we would be giving the rubbish. 
These boats are state of the art, albeit some are slightly aged but there is nothing wrong with them. 

One of reasons, I have been led to believe, a to why vessels must be broken up was that in the very beginning of the decommissioning sheme system, many years ago.  Vessels were sold to other countries and ultimately they ended up back here and fishing again under other names and other licences. 
Basically people saw a way to 'scam' the system and they did. 
Sadly this problem has been overcome by the destruction of the vessel being seen as the simplest and easiest way to stop this happening. 
Rather than spending time creating a way of working around this it has been easier to 'cut' a vessel up.

I have a simple(ish) and easy way to get around this. 
The MCA has a database of every engine on every commercial boat.  They have the spec's for engine power and if an engine is to be added to that database now I am pretty sure it would have to be a brand new engine to get on it. 
Use this database along with the registry of vessels (Every vessel has a unique number) to tie in the boats to the fishing fleet and new additions. 
Cross reference the numbers with any licence transactions and if there are discrepancies when someone tries to use a vessel removed form the registry then put on hold the licence application and criminally investigate the person trying to re-administer the said vessel.
Surveyors already check RSS numbers and engine numbers  The would see if numbers had been tampered with and lets face it if the fine was big enough... 
The government could easily issue tamper proof documentation that lives and dies with every vessel (This already works for Microsoft, you try and transfer software from one PC to another!), as well as making marks on vessels perhaps bar coded.
The cost of doing something like this could be met both by the skipper removing the vessel from the licencing scheme as well as the person receiving the vessel. 
I am sure there are way cleverer people out there how could come up with other ideas to keep these vessels from being destroyed.

The saddest thing about the whole destruction of a vessel is that the fishing license for the vessel destroyed is not gone, merly shelved for five years.  There is nothing to stop a brand new boat being built to take the license in five years. 
Technically as far as I can see, the present owner can have a five year holiday at the governments expense then build or buy another boat and be in exactly the same situation as he was before the boat was decommissioned under this set of procedures!!
Where the hell is the logic in this?
This is doing very little for the fish stocks,as you would would have thought they would have got a five year rest.... well no not exactly. 
The licence that has been shelved, is only shelved so as to stop the present entitlement holder using it. 
There is nothing stopping him from renting it out, now, to a third party who is needing quota or would like to add more to his own. 
We are in a position of having fewer boats (for five years) with more quota.

I wonder if any of them will buy bigger boats meantime?

If you think what I have written is not factual or naive, please drop me a line and let me know,  please no hater's!  I only have put down in black and white what I and many other people think.  I have not used any skippers opinions or thoughts here and any expressed are purely my own. 

Thanks to the skipper of the Rebecca McLean for allowing me to take the pictures as well as letting me have a few bits and pieces.  It can't be easy watching your boat be destroyed no matter what the recompense.  

On another tack - I am on yet another scrounging mission.  I would like to buy or borrow a wooden (Or fibreglass) dinghy between 12 and 18 feet.  
I would prefer something I could work on so as to keep purchase costs down.  But the same can apply if your lending one, you will get it back better that you gave it to me!  e-mail if you have something you might like to part with,  Thanks in advance!!